




15 Inside Chicken Coop Designs That Solve Real Problems
The outside of the coop is what photographs well. The inside of the coop is what determines whether your flock is healthy, your eggs are clean, and your daily care routine takes ten minutes or forty-five.
The most common chicken keeper regret is not a design element they forgot to add — it is a design element they added incorrectly, in the wrong location, at the wrong height, without thinking through the daily management implications. The beautiful coop that is impossible to clean. The nesting boxes that all the hens share face the wrong direction. The roost bars are installed too close together or too close to the wall. The ventilation is adequate for spring and completely insufficient for August.
Those tiered nesting boxes running along both walls are excellent. Each hen can find her private spot to lay eggs. Everything looks organized. With a clean center aisle, daily care and feeding become so much easier.
Free Backyard Flock Checklist
Planning the rest of your flock setup?
Turn your coop-size estimate into a complete setup plan with our free equipment and preparation checklist.
These fifteen inside chicken coop ideas are the ones that solve real problems — each one chosen because it addresses a specific interior design decision that affects flock health, egg production, or the keeper’s daily experience. Function first. Beauty second. Both, where possible. Also Read 8 Small Backyard Chicken Coop Ideas That Actually Work
Idea 1: The Roll-Away Nesting Box — Clean Eggs Without the Hunt
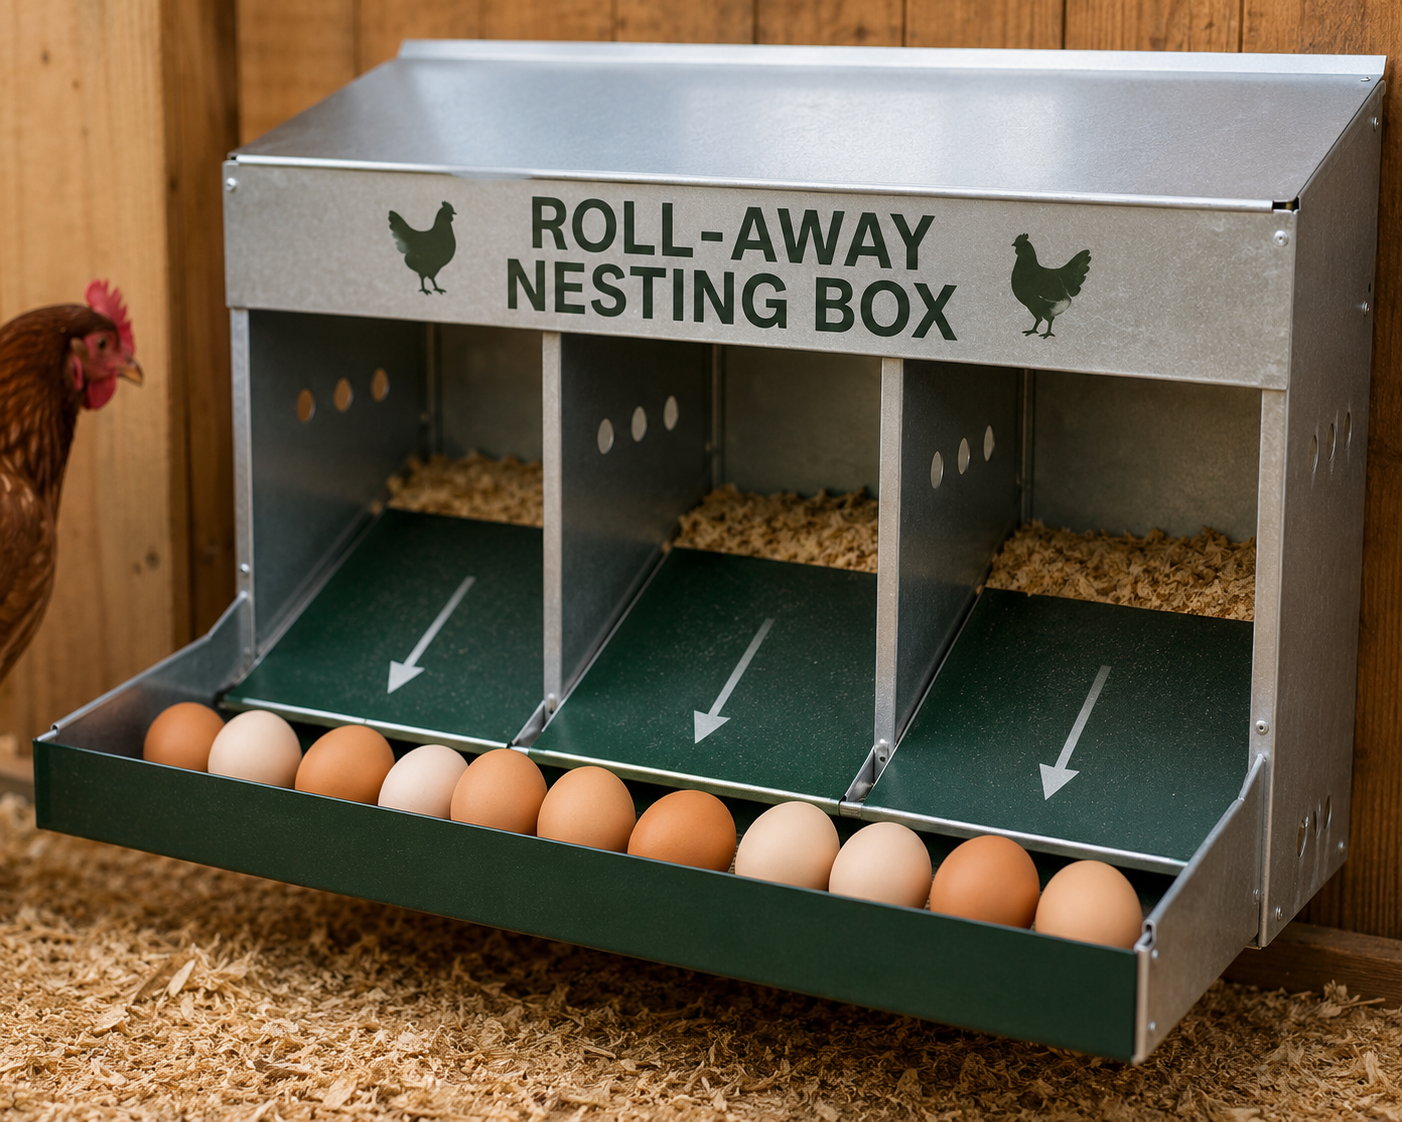
No more hunting for eggs! This roll-away nest box lets the eggs gently roll to the front for easy collection — no disturbing your hens.
A well-designed roll-away nesting box can reduce broken or soiled eggs and make collection easier, although it does not directly increase a hen’s laying rate. The floor of the nesting box is slightly sloped — typically two to three inches of slope over the depth of the box — so that as soon as an egg is laid, it rolls gently forward to a collection tray at the front of the box.
The benefits compound: eggs cannot be broken by subsequent hens entering the box. Eggs are not contaminated by the hen sitting on them after laying. Hens cannot develop the habit of eating eggs (a behavior problem that starts when a hen breaks an egg accidentally and discovers it is edible). And egg collection from outside the coop through a rear collection door takes thirty seconds rather than the hunt-and-pry that conventional boxes require.
Installation: The slope can be built into new construction or retrofitted into existing boxes using a piece of angled plywood. The collection tray at the front should be lined with a soft material — AstroTurf or rubber matting — to cushion the rolling eggs.
Idea 2: The External Egg Collection Door — Never Enter the Coop to Collect Eggs
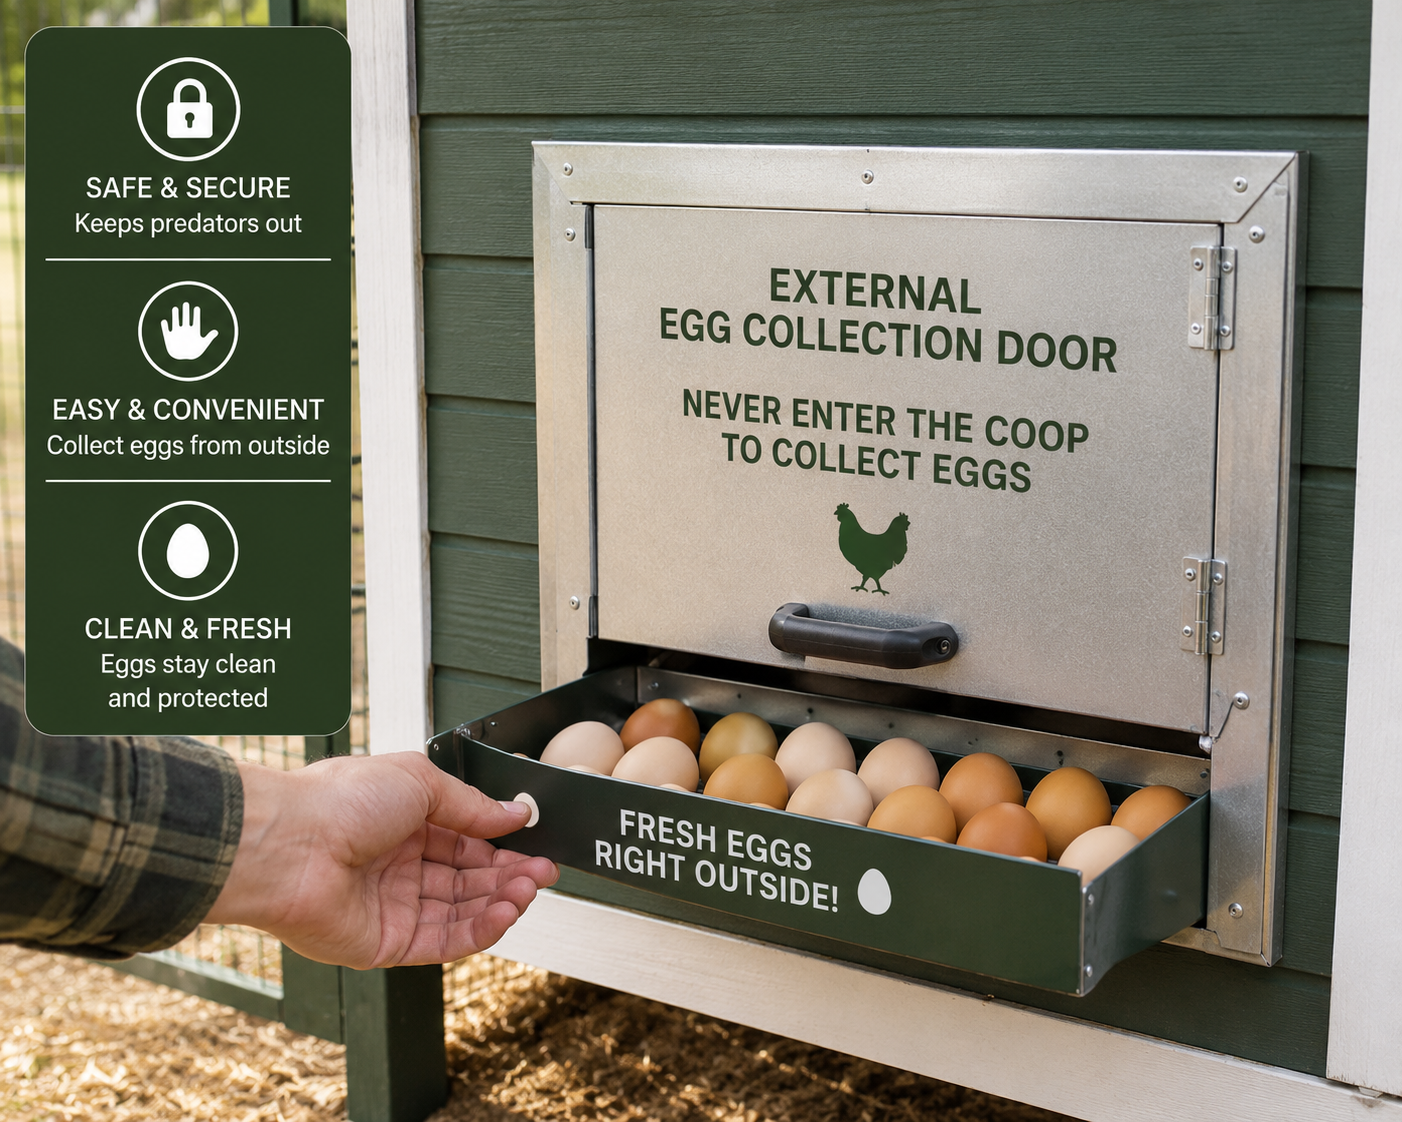
Install a side door to access eggs easily without entering the coop.
One of my absolute favorite parts of this chicken coop is that it has a set of DIY nesting boxes that are easily accessible from the backyard without ever having to go in the chicken coop!
The external collection door — a hinged panel on the outside of the coop that opens to reveal the back of the nesting boxes — is the interior modification that saves the most time over the life of the coop. Rather than opening the main coop door, stepping inside, disturbing the flock, and navigating the bedding to reach the nesting area, egg collection becomes a matter of opening a panel from outside, reaching in, and closing the panel.
This modification also reduces the traffic through the main coop entrance that disturbs the flock’s settling behavior in the morning and afternoon laying hours.
Key detail: The external collection door must be securely latched — raccoons are persistent and capable of opening simple hook latches. A two-step latch or a carabiner on the collection door is the security standard.
Idea 3: The Sliding Poop Tray Under the Roost Bars
Place a sliding drawer under the roosts. It makes cleaning much easier.
Chickens produce the majority of their daily waste overnight while roosting. The area directly beneath the roost bars is the highest concentration point of waste in the entire coop — and the most critical area to keep clean, because ammonia production from accumulated waste is highest here.
A sliding tray — built from plywood or a galvanized metal sheet with edges folded up — installed directly beneath the roost bars collects the overnight waste on a surface that can be removed, emptied, and replaced in under two minutes. This daily two-minute task replaces the weekly or twice-weekly full bedding change that the same waste amount creates when deposited directly into floor bedding.
The tray should extend at least twelve inches beyond each end of the roost bar cluster and be at least eighteen inches from front to back. The slides — simple wooden runners or metal drawer slides — should allow smooth withdrawal with a full tray.
Idea 4: Roost Bars at the Right Height — Above Everything Else
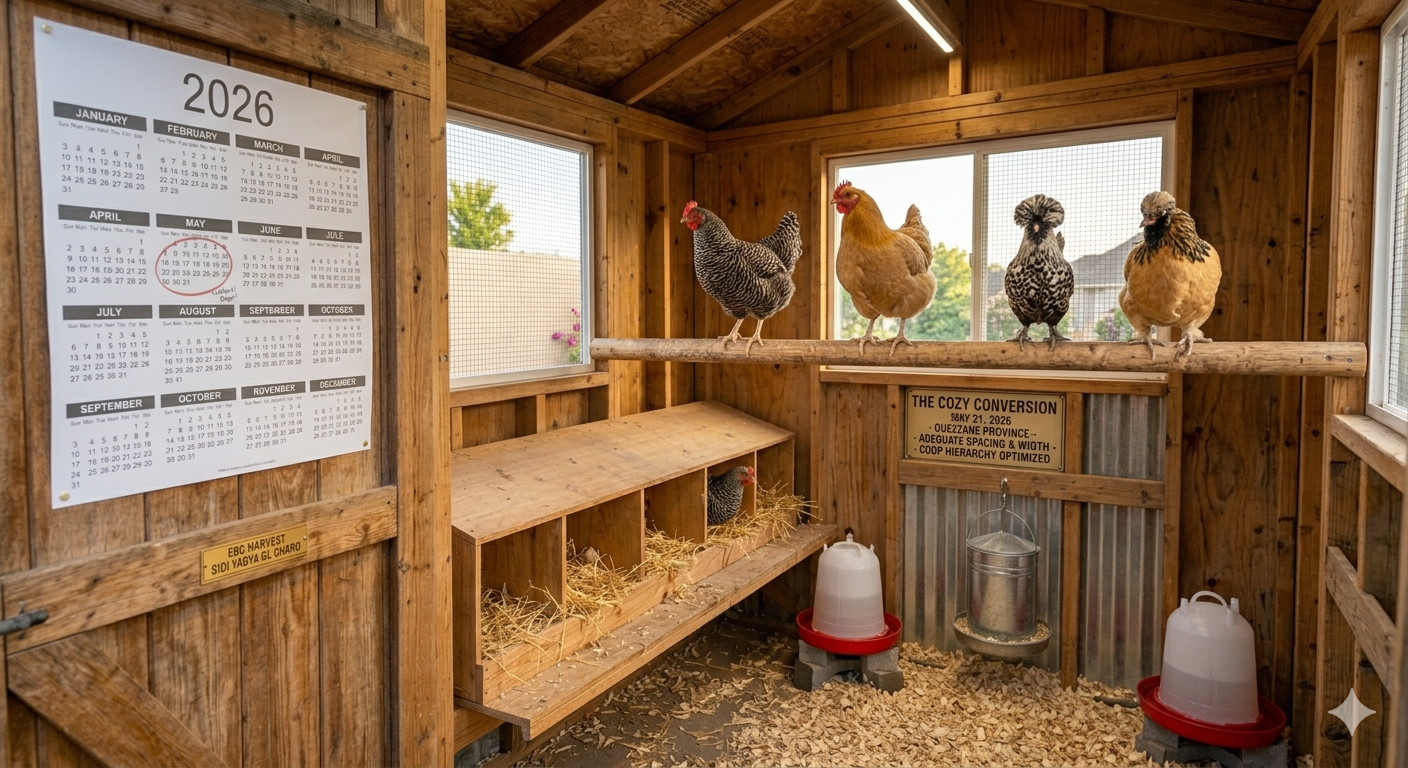
Chickens sleep at the highest available point in their environment. The roost bar height hierarchy determines where each chicken sleeps, who occupies the prime spots (the most dominant birds), and — critically — what gets used as sleeping surfaces when roost bar access is limited.
Use the height of the coop. Add roosting bars at different levels. Chickens need a warm place to sleep. Build an enclosed roosting area.
The critical rule: roost bars must be the highest point in the coop. Nesting boxes positioned above the roost bar height become sleeping spots. Hens sleeping in nesting boxes contaminate the laying area and make egg collection unpleasant. Position roost bars at the maximum comfortable height in the coop — typically 24 to 36 inches off the floor for standard breeds — and ensure that no other surface in the coop is higher.
Roost bar width: 2 to 4 inches, flat-topped is preferable to round dowels for most breeds. The flat or slightly rounded surface allows hens to perch with their feet flat, covering their toes with their feathers for warmth in winter, reducing frostbite risk significantly.
Spacing: 10 to 12 inches of roost bar length per bird. 12 to 18 inches of vertical spacing between multiple bars if a tiered system is used.
Idea 5: Curtains on Nesting Boxes — The Productivity Upgrade
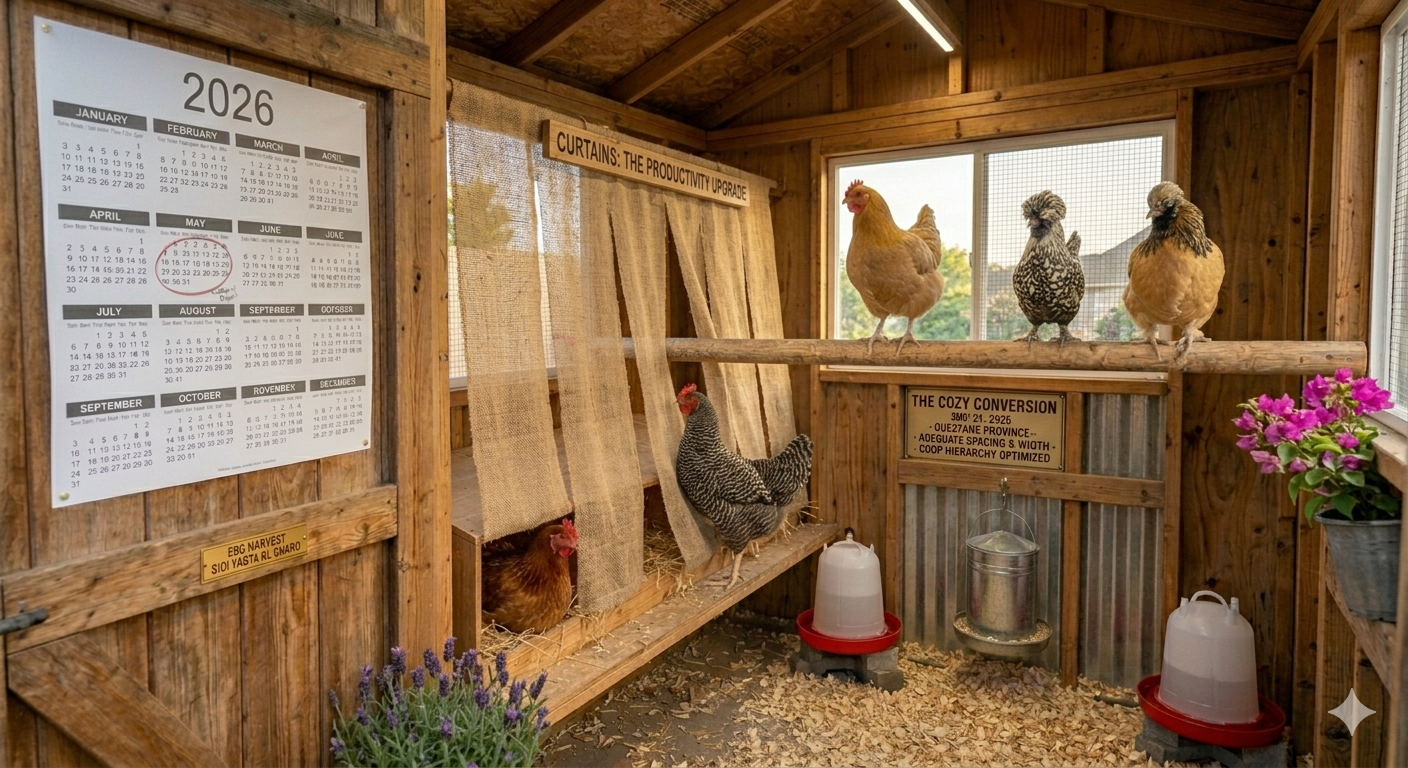
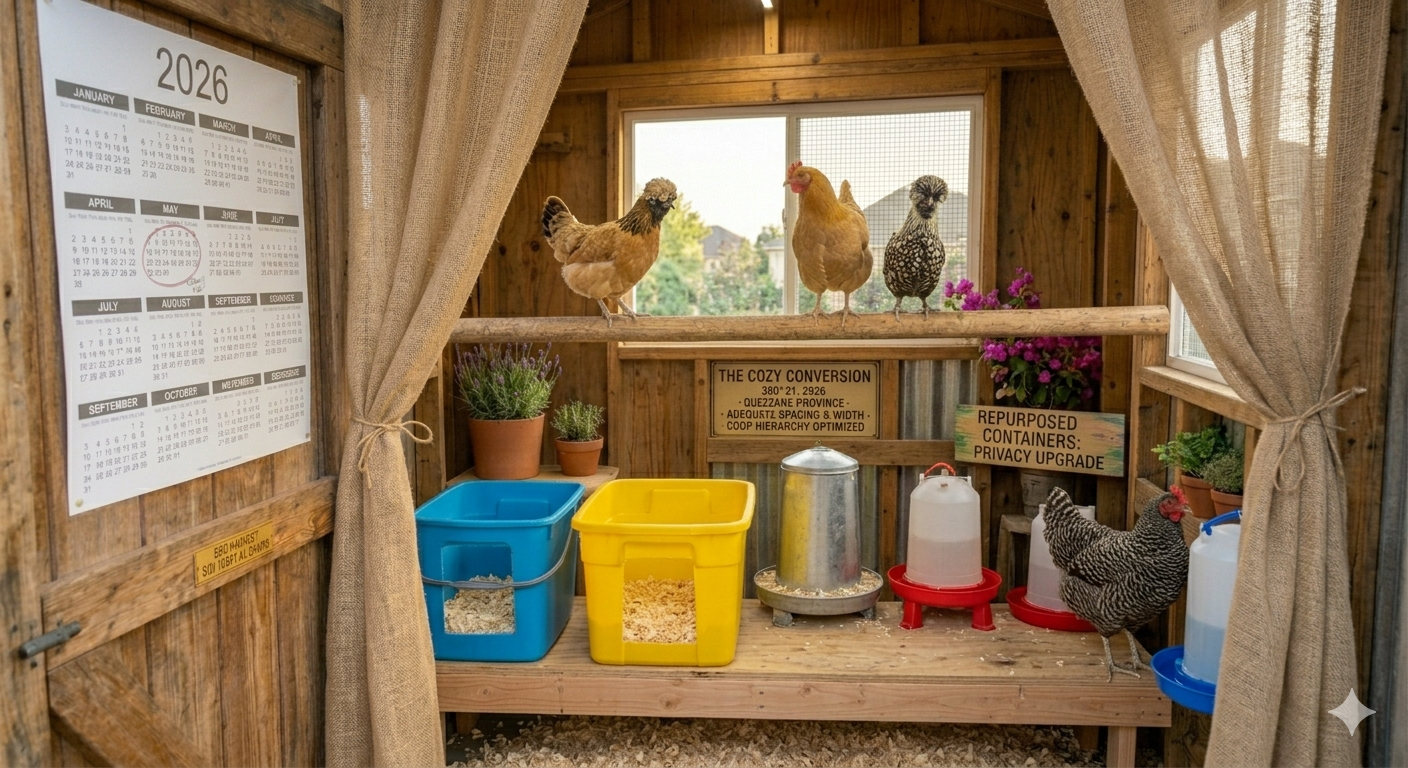
Old cloth or curtains can cover nesting boxes. This gives hens privacy.
Hens prefer to lay in dark, enclosed, private spaces — their instinct is to lay eggs where predators cannot easily find them. A nesting box that is dark, enclosed, and secluded is a nesting box that hens use consistently. A nesting box that is bright, open, and in a high-traffic area is a nesting box that hens avoid in favor of the darkest corner of the coop floor.
Simple curtains — strips of burlap, canvas, or heavy fabric cut to hang from a rod above the nesting box opening — significantly increase nesting box use in flocks that have been avoiding them. The curtains can be brushed aside by an entering hen and fall back into place behind her, creating the enclosed environment she is seeking.
This is the five-minute, low-cost interior modification that solves the most common nesting problem. Try it before investing in new nesting boxes.
Idea 6: The Chalkboard Feed and Production Tracker
That chalkboard tracking system is genius; you can keep tabs on egg production, feeding schedules, whatever you need. Everything has a designated spot, which makes daily chores so much smoother and faster.
A small chalkboard or whiteboard mounted inside or just outside the coop — tracking daily egg production per hen (or total), feed and water check times, any health observations, medication records, and molt start dates — converts the daily coop visit from a routine task into a data-collection moment that produces genuinely useful flock management information over time.
What to track: Daily egg count, any hen that is off-lay and when the off-lay started, feed and water check completion, any behavioral changes observed, and the date of the most recent full coop cleaning. This thirty-second daily record produces a year’s worth of production data that allows meaningful flock management decisions.
Idea 7: Wall-Mounted Feeders and Waterers — Off the Floor Completely
Save space with hanging feeders and waterers. This keeps food and water clean. Adjust the height to match the chickens’ neck level.
Save floor space and keep your coop clean with suspended feeders and water containers.
Floor-level feeders and waterers in a chicken coop collect bedding, waste, and the general debris of chickens going about their business. Within hours of filling, a floor-level waterer may contain visible contamination that reduces consumption and increases disease risk.
Suspended or wall-mounted feeders and waterers — positioned at approximately the height of a chicken’s back — prevent most of this contamination. Chickens reach into the feeder at the correct angle, less bedding is scratched into it, and the daily cleaning requirement is significantly reduced.
The height rule: The bottom of the feeder or waterer should be at approximately the height of the average chicken’s back in your flock. Too high prevents adequate access for younger or smaller birds. Too low allows waste contamination.
Idea 8: Dedicated Dust Bath Box — Inside for All-Weather Access
Chickens love dust baths. Create a box with dry soil, sand, and wood ash. This helps them stay clean and free from pests.
Dust bathing is a biological need for chickens — they use it to control external parasites and maintain feather condition. In coops or runs without accessible dry dust bathing material, chickens will find their own solutions (including dust bathing in the bedding, which disrupts the bedding management system significantly).
An indoor dust bath box — a low-sided wooden box or repurposed container filled with a mixture of dry soil, fine sand, and wood ash — provides year-round dust bathing access regardless of weather. Position it in a corner of the coop or run where the resulting scatter is contained and manageable.
Materials for the dust bath mix: Use dry, loose soil or sand that stays free of mold and contaminants. Avoid creating fine airborne dust inside a poorly ventilated coop, and do not rely on a dust bath as a substitute for diagnosing or treating a parasite problem.
Idea 9: Creative Nesting Box Options Beyond Standard Wooden Boxes
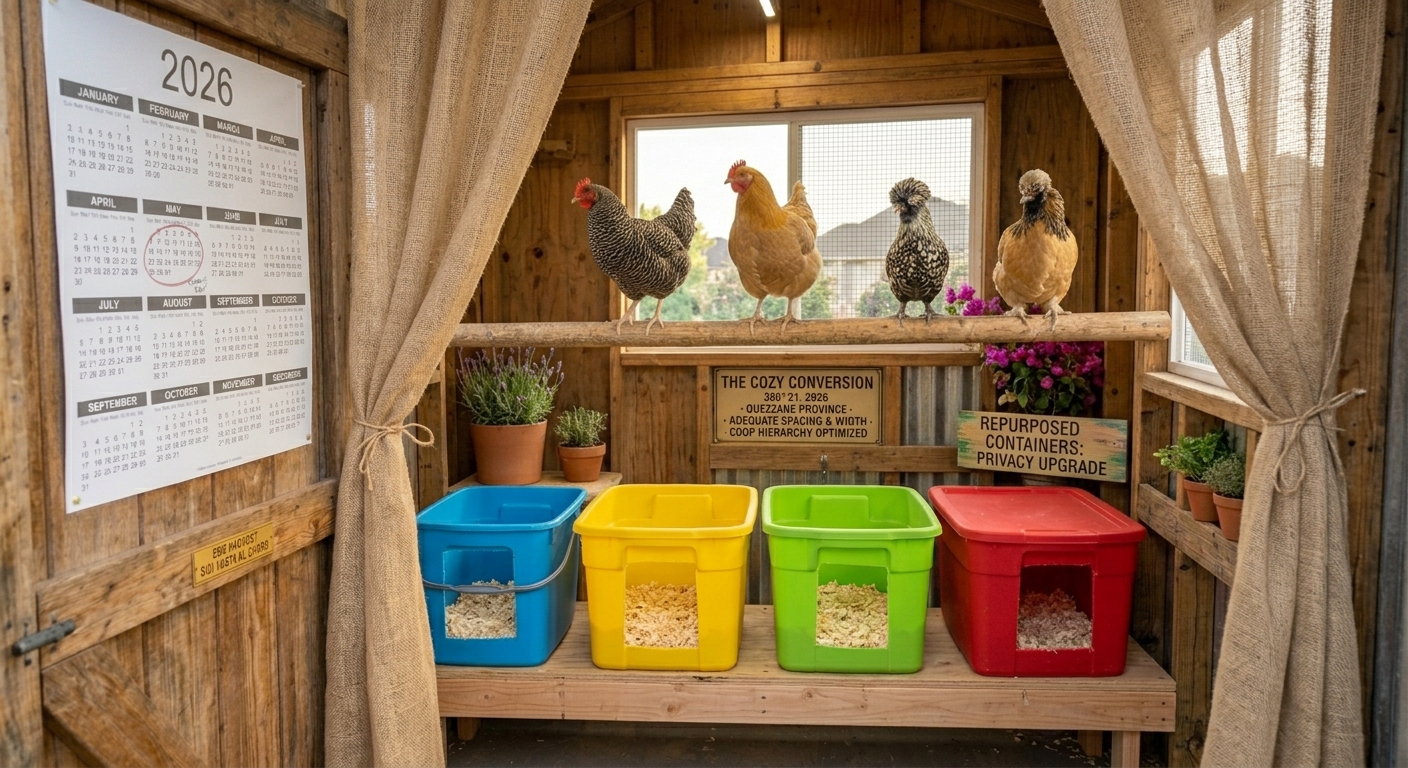
5-gallon buckets. Just lay them on their sides and prop up the front with a block of wood or a brick — works great! Dishpans from the dollar store. I sized the partitions to fit and keep a few cleaned and ready to go in. They are also removable from the outside via a hatch.
Milk crates are strong, cheap, and easy to clean. They are one of the easiest DIY nesting box options. You can even stack or hang them to save space. Five-gallon buckets are common in many homes and farms. With a few quick changes, you can turn them into durable, easy-to-clean nesting boxes.
The creative nesting box solutions that perform just as well as purpose-built wooden boxes — and in many cases better, because they are easier to clean and replace:
5-gallon buckets on their sides: The enclosed shape is exactly the dark, private space hens prefer. Prop the opening end slightly upward so eggs do not roll out. Easy to remove and clean. Free from many sources.
Milk crates: The ventilation provided by the crate sides prevents moisture accumulation. Stackable for space efficiency. Removable for cleaning. Can be mounted on a wall-mounted frame at the appropriate height.
Plastic dish pans: Wide, low-sided, and removable. Several can be cleaned simultaneously by removing them from the coop entirely. Available inexpensively at dollar stores.
Bright plastic containers can make an inexpensive, easy-to-clean nesting system. Hens may still share a favorite box, so provide enough suitable spaces and monitor laying patterns.
Idea 10: Window Placement for Maximum Ventilation and Light
Natural light and ventilation are key to maintaining a fresh coop environment. Large, mesh-covered windows improve airflow, reduce odors, and bring in plenty of sunshine. They not only make the coop pleasant for your chickens but also reduce moisture build-up, which can lead to health issues.
Window placement is one of the most consequential interior design decisions — it determines light levels that affect laying behavior, ventilation patterns that affect respiratory health, and the visual experience of the coop interior that affects how easy it is to observe the flock’s behavior during daily visits.
For laying: Chickens require approximately 14 to 16 hours of light exposure to maintain peak laying behavior. South-facing windows (in the northern hemisphere) provide the longest daily light exposure and the most warmth in winter months.
For ventilation: Windows on opposite walls create cross-ventilation. Windows positioned near the roofline allow moisture and ammonia to exit without creating drafts at the roost level. Adjustable windows — that can be partially opened in summer and partially closed in winter — provide year-round ventilation management.
For security: All windows must be covered with hardware cloth, not chicken wire. The window provides light and air; the hardware cloth provides predator exclusion.
Idea 11: The Organized Tool Storage Wall
Add hooks to hang cleaning tools like a brush and scraper.
That chalkboard tracking system is genius. They’ve got hay bales piled up efficiently and all those fresh eggs displayed in wooden crates. The pendant lighting makes it feel professional. Everything has a designated spot, which makes daily chores so much smoother and faster.
A coop interior that has a designated place for every tool produces a coop that is cleaned faster, managed more consistently, and visited with less friction than one where the shovel is somewhere in the garden, the scraper is inside from the last cleaning, and the broom is leaning against the run fence.
Simple hooks on the interior coop wall — or just outside the coop entrance — hold the daily-use tools: small flat shovel for poop-tray emptying, stiff brush for bedding raking, scraper for stubborn deposits, and small broom. Everything visible, everything accessible, everything exactly where you left it last time.
Idea 12: The Anti-Roosting Nesting Box Top
Hens who sleep in nesting boxes contaminate the laying area with overnight waste — making eggs dirty, creating hygiene problems, and producing the behavior loop where dirtier nesting boxes produce less consistent laying, which produces more floor sleeping, which produces dirtier nesting boxes.
The fix is architectural: install a sloped board over the top of the nesting box cluster at a 45-degree angle. This prevents any hen from landing on and roosting atop the boxes, which is the first step in the sleeping-in-boxes cycle.
Place a sloped board on top so birds do not sleep there and soil the boxes.
This simple modification — a piece of plywood cut to fit and installed at an angle — is one of the most effective single changes available for coops where hens are sleeping in the nesting area.
Idea 13: Lighting That Extends Winter Production
If you add supplemental lighting, use a securely mounted, low-wattage fixture on a timer for light—not as a heat source.
Chickens require approximately 14 to 16 hours of light to maintain peak egg production. In winter months, when natural daylight falls to 8 to 10 hours, egg production drops dramatically in most flocks — not because of temperature, but because of reduced light exposure.
A simple timer-controlled light — adding artificial light in the early morning hours before dawn rather than in the evening, which disrupts the sleep cycle — extends the light exposure to the production threshold without the welfare concerns associated with evening light addition. A low-wattage LED bulb on a timer that turns on two to four hours before dawn provides the necessary light extension with minimal energy cost.
Important: Do not use heat lamps as both heat and light sources — they are a significant fire risk. LED bulbs on timers provide safe, effective light extension.
Idea 14: Removable Nesting Box Liners
Use removable trays inside nesting boxes. Cleaning becomes simple and fast.
Any nesting box that requires crawling into, scraping, or significant physical effort to clean will be cleaned less often than it should be. Any nesting box with a removable liner that slides out, tips into a compost bin, and slides back in will be cleaned on the correct schedule because the correct schedule requires approximately forty-five seconds per box.
Removable liners can be: plastic dish pans that fit the box dimensions exactly, cut-to-fit rubber mats, or dedicated nesting box liner products. The key is that the entire contaminated surface can be removed and replaced in a single action rather than cleaned in place.
Idea 15: The Aesthetic Coop Interior — Because You Visit It Every Day
This is full-on cottage core. That floral wallpaper is precious, and those pink nesting boxes look like they belong in a dollhouse. The “CHICKEN COOP” sign with the decorative wheel is a pretty touch.
Someone has turned their chicken area into the most organized farm supply center. The pendant lighting makes it feel professional. Everything has a designated spot.
The coop interior that is genuinely pleasant to be in — that has been painted, has a sign above the door, has organized storage, has fresh bedding that makes the space smell like wood rather than ammonia — is the coop that gets visited more consistently, cleaned more readily, and maintained at the standard that keeps the flock healthy.
This is not vanity. It is behavioral reality: people take better care of spaces they find pleasant to be in, and the chickens live in the space their person is motivated to maintain. The aesthetic coop interior is a health infrastructure decision as much as a design one.
Paint the interior walls white — it reflects light, making the space brighter for both hens and the keeper. Name the coop and paint it on the door. Add a hook for a lantern or a small LED light that makes winter visits at dusk more pleasant. These are small investments that produce consistent daily maintenance returns for the life of the coop.
Experienced chicken keepers have faced, diagnosed, and solved these problems before. Once the cause is identified, the solutions are usually simple, affordable, and quick.
Fifteen ideas. Not all of them are for every coop. But every coop has at least three of them that would make a meaningful difference tomorrow.
Choose the two or three changes that solve your flock’s most pressing problems, then observe how they affect cleanliness, safety, and daily care before adding more.
Sources and further reading
- University of Minnesota Extension: Raising chickens for eggs
- Oregon State University Extension: Why did my chickens stop laying?
Continue Exploring Your Backyard Flock
Use these closely related guides to plan your next steps:
3 thoughts on “15 Inside Chicken Coop Designs That Solve Real Problems”
Comments are closed.